Read more
AnimalsDrawingNature
 |
| Add caption |
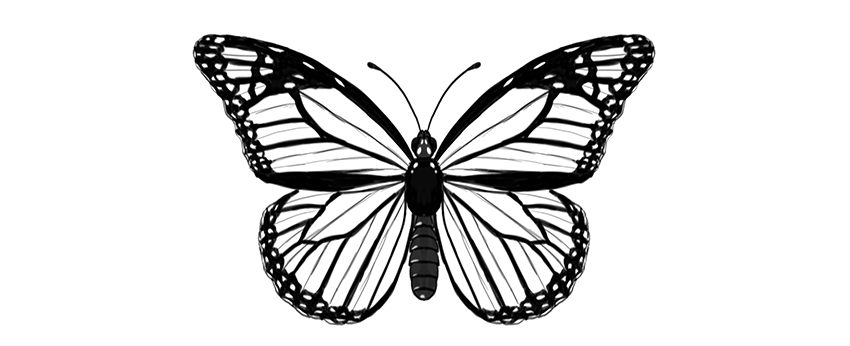
Butterflies are a wonderful drawing subject—their wings have a certain pattern that can be reduced to a few rules. Once you know the rules, you can draw a realistic-looking butterfly without any special drawing skills.
In this tutorial, I will show you how to draw a monarch butterfly step by step, right from scratch. You can also modify my method to draw any other butterfly!.
How to Draw the Body of a Butterfly
Step 1
Sketch a vertical oval for the torso.
 |
Step 2
Cross the torso in half with a vertical line. This will be the length of the body.

Step 3
Draw a longer oval below; this will be the abdomen.

Step 4
Connect the abdomen to the torso with a slim waist.

Step 5
Draw a circle on top of the body—this will be the head.

Step 6
Add two ovals on the sides of the head.

Step 7
Add two tiny ovals on the front of the head. These will be the short, furry antennae called palpi.

Step 8
Draw a pair of curves for the big antennae.

Step 9
End each antenna with tiny "beans."

Step 10
You can now outline the body and add all the necessary details. The torso is fluffy, and the abdomen is segmented.


2. How to Draw Butterfly Wings
Step 1
Mark a dot in the upper part of the torso. This will be our point of reference for placing the wings.

Step 2
Draw a horizontal line across the point. Each half should be roughly as long as the whole body (antennae excluded).

Step 3
Draw two longer lines about 30 degrees over the previous line. You don't need to measure anything—just eyeball it.

Step 4
Draw elongated teardrop shapes around these lines, as if it were a dragonfly.

Step 5
Draw a line from the end of the horizontal line to about 60% of length of that "dragonfly wing."

Step 6
Gently outline the shape of the upper wing.


Step 7
The lower wing can be created in a similar way. Draw two lines down from the point, slightly below the abdomen.

Step 8
Draw a line between each end of the lines and the upper wings.

Step 9
Draw a line from the torso point to close the triangular shape of the wing right under the upper wing.

Step 10
Mark a point in the center of the farthest line of the triangle.

Step 11
Cross each point with a line coming from the torso.

Step 12
Outline the shape of the lower wing.


3. How to Draw the Cells of Butterfly Wings
Step 1
Now we're going to divide each wing area into smaller areas called "cells." First, mark three points in the area shown below.

Step 2
Draw an elongated cell through these marks.

Step 3
Use the same trick to draw a similar cell in the lower wing.


Step 4
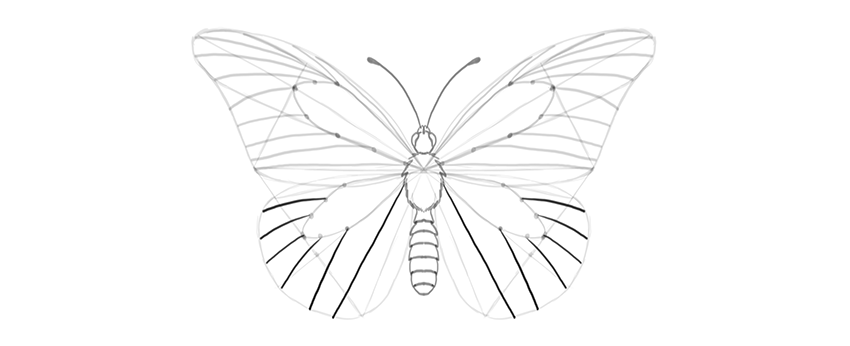
There will be more cells starting here. Mark their starting points.

Step 5
Draw gentle curves from these points to the edge of the wing. Have them slightly falling down.

Step 6
The uppermost cell is divided into more cells:

Step 7
The lower wing has similar cells, going out radially from the middle:


Step 8
Each cell has a subtle "wrinkle" in the center, and it will be a useful guideline for us. Mark it subtly, to make it distinguishable from the veins.

4. How to Draw Patterns on Butterfly Wings
Step 1
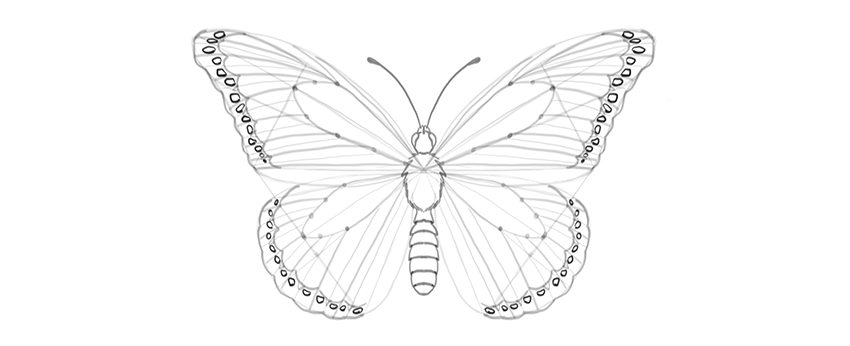
Now we have plain butterfly wings, but it's their pattern that makes them so beautiful! Let's add a pattern specific for the monarch butterfly.
Create a margin for each wing, drawing curves between the veins.

Step 2
Mark the area where the wrinkle is—this place will be slightly less dark.

Step 3
Outline the edges of the wings, making them "bumpy" around the ends of the veins.

Step 4
There is a pattern of bright dots in the margin. Outline them.


Step 5
The edges of the wings may look slightly ragged because of white lines placed between the veins and the wrinkles. This is a subtle effect, but it will add to the realism of the wings.

Step 6
Draw some markings in the upper part of the upper wings.

Step 7
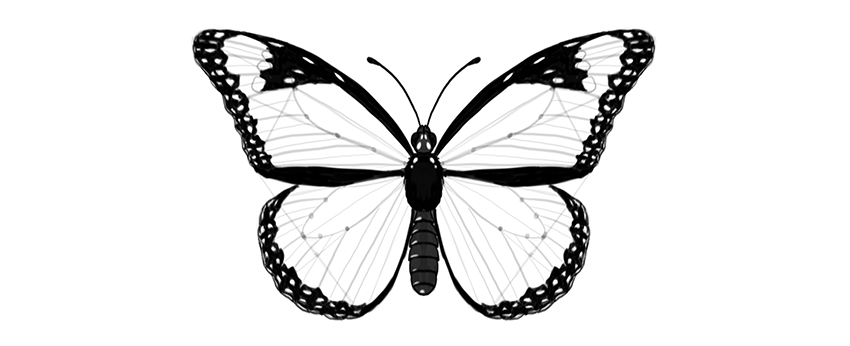
The pattern is created not by lines only, but mostly by contrast. So we need to darken certain parts to achieve realistic results. First, darken the body. It may have some pattern on it as well!

Step 8
Darken the side margins, leaving brightness where the markings are.

Step 9
Darken the margins, moving carefully around the little markings.

Step 10
Darken the area around the markings in the upper wing.

Step 11
The veins have a dark outline, so mark it. You can also subtly mark the wrinkles to make the drawing more detailed.

Beautiful!
Good job, you have drawn a beautiful butterfly! If you want to learn more about butterflies, their anatomy, and other species, make sure you check this tutorial as well:


0 Reviews